Thursday, September 30, 2004

Recipe File: Campbell's Green Bean Casserole

Green bean casserole is a classic homestyle favorite in American homes. This particular recipe from Campbell's is probably the most popular recipe for green bean casserole. Not only is it easy to make, but it's delicious. The "correct" way to make Campbell's Green Bean Casserole is, of course, to use Campbell's brand Condensed Cream of Mushroom soup and French's brand Original French Fried Onions. Of course, any other brand of cream of mushroom and french fried onions will do.

Assemble the ingredients: 3/4 cup whole milk, 1/8 tsp. pepper, 10-3/4 oz. can cream of mushroom, two 14.5 oz. cans of cut green beans, and 1-1/3 cups french fried onions.


Open the cans and drain the water from the green beans. Pour all the ingredients except for 2/3 cup onions into a 1-1/2 quart casserole (I used a 8 in. square baking pan)


Mix.


Bake at 350°F (175°C) for 30 minutes.


After thirty minutes in the oven, the casserole should be nice and hot. Take it out and top with the reserved onions. Bake for an additional five minutes.


Campbell's Green Bean Casserole (serves six)

Preheat oven to 350°F
2 14.5 oz. cans of cut green beansdrainmixbake 350°F 30 min.bake 350°F 5 min.
3/4 cup whole milk
1/8 tsp. pepper
10-3/4 oz. can cream of mushroom
2/3 cup french fried onions
Copyright Michael Chu 2004

Wednesday, September 29, 2004

Recipe File: Grilled Salmon

Recently, I decided to reintroduce salmon into my diet because salmon is a rich source of omega-3 fatty acids. But, Tina finds that cooked salmon is usually very dense, chewy, and not very tasty. The easiest salmon recipe I know is simply to sprinkle lemon-pepper on salmon, optionally add some garlic slices, and bake at 350°F. Unfortunately, unless you enjoy the natural cooked flavors of salmon, this dish isn't that compelling. Lucky for me, the July & August 2004 issue of Cook's Illustrated magazine contained a quick recipe for Glazed Salmon. Not only is this recipe easy to make, it tastes excellent.

First I took a large fillet of salmon and cut into pieces, each about 8 oz. (225 grams).


I measured out 1/3 cup soy sauce and 1/3 cup maple syrup.


After mixing the soy sauce and maple syrup together, I poured it into a 9x13 in. pan. I placed the salmon filets flesh side down into the mixture. In my case, I had more salmon than could fit in a single pan, so I whipped up another batch of soy sauce and maple syrup for the extra pieces. I slipped these into the refrigerator while preparing the glaze.


I then poured 2 tablespoons of soy sauce and a 1/4 cup of maple syrup into a small saucepan. I then brought it to a simmer and held it there for a couple minutes to thicken up into a glaze. I set aside two tablespoons for use later and took the rest outside to the grill (which I turned on).


I took the salmon out of the refrigerator and liberally covered the flesh of the fillets with fresh ground black pepper.


I took the salmon out to my preheated grill. After soaking a paper towel in some vegetable oil, I used a pair of tongs and rubbed the grill with oil to keep the fish from sticking. Then, I placed the salmon flesh side down on the grill over high heat for three minutes.


I flipped the salmon over (still on high heat) and brushed some glaze over each piece (onto the exposed flesh).


After two minutes (when the thickest part of the filet has been cooked about halfway through), I brushed more glaze onto the flesh and flipped them over onto the low heat side of the grill.


After another two minutes, the salmon is done. Brush the reserved glaze on and it's ready to serve. If cooked properly, the salmon should have a nice crust as well as a soft almost flaky interior. (If it flakes easily, then it's a bit overcooked.)


The final judgment? Tina liked it - so it's a keeper.


Grilled Salmon (serves 6)

Preheat grill
1/3 cup soy saucemixsoak
1/3 cup maple syrup
6 8 oz. salmon filletspeppergrill flesh downgrill skin downgrill flesh down on low
2 Tbs. soy saucereduce
1/4 cup maple syrup
Copyright Michael Chu 2004

Monday, September 27, 2004

New Feature: Ingredients Dictionary

You may have been wondering what I did this weekend (or not)... Well, I've built a new section to the website to help the international audience (and those of us who can't tell the difference between a winter squash and a meat tenderizer [although winter squashes work pretty well as a meat mallet...]) to figure out what ingredient is what. Say hello to the Ingredients Dictionary.

I started with the priority of posting pictures of each ingredient. Later, I'll fill in the details of each ingredient with information on how to store and select them at the markets. The photos were all taken at Cosentino's Market in Santa Clara, CA where the staff was exceedingly nice and the produce fresh and pretty. I spent a couple hours there rearranging produce, chatting with the grocers, and snapping away. It's probably going to take many, many trips to get pictures of most of the common ingredients. Well, I better go take some more pictures...


Go to the Ingredients Dictionary

Friday, September 24, 2004

Test Recipe: Avocado Pork Stuffed Peppers

The other day I tried my hand at creating a new recipe for stuffed peppers. Looking around the kitchen, I found a ripe haas avocado and some fresh ground pork. I wondered what it would taste like if I used the avocado in a meatloaf type stuffing for some bell peppers I purchased at the local market.

I cut open the avocado, removed the pit, and spooned out the flesh into a bowl. I then added about two tablespoons of chopped scallions (sometimes called green onions), one teaspoon of white pepper, one teaspoon of cumin, 1/4 teaspoon of crushed red pepper, and 1/4 teaspoon of salt. I also prepared one large egg and 1/3 cup of corn meal (to act as a binder).


I hisked the egg to break it apart and added it to the bowl. I mixed 1/2 pound of ground pork with the other ingredients in the bowl by hand, then added the corn meal and worked it until it started to hold together as a large clump. Using a sharp paring knife, I cut the top of bell peppers off. I completed the coring with a spoon, scraping the ribs from the inside of the pepper. I then rinsed the peppers to remove extra seeds.


I added 1 teaspoon of olive oil to each of the peppers and then spooned the meat mixture into the peppers. The mixture didn't fill the peppers all the way, so I stuffed some bacon into the pepper to top it off. I placed the peppers into an aluminum foil lined pan for easy clean up and slipped it into an oven preheated to 350°F.


After one hour, the peppers were roasted and the stuffing was fully cooked. Unfortunately, the bacon hadn't crisped.


It looked good, but it wasn't seasoned enough. I ended up eating this dish with extra salt. The bacon was underdone and probably could have used a little bit of a precook in the pan. I almost forgot that an avocado went into making the stuffing because I could barely taste it. Also, the grittiness of the cornmeal took a little getting used to. Next time I'll use bread crumbs. Otherwise, it was quite satisfying and made for a decent dinner.

If I was to do it again, I would precook the bacon, add more salt, and use another avocado. I'll post both recipes below.


Avocado Pork Stuffed Peppers (serves two)
Tested Recipe

Preheat oven to 350°F
2 large bell pepperscoreoilstuffbake 350°F 60 min.
1 tsp. olive oil
1/2 lb. ground porkmixmix
1 haas avocadomashmix
2 Tbs. scallions, chopped
1 tsp. ground white pepper
1 tsp. cumin
1/4 tsp. crushed red pepper
1/4 tsp. salt
1 large eggbeat
1/3 cup corn meal
2 strips bacon
Copyright Michael Chu 2004

Modified Recipe
Preheat oven to 350°F
2 large bell pepperscoreoilstuffbake 350°F 60 min.
1 tsp. olive oil
1/2 lb. ground porkmixmix
2 haas avocadomashmix
2 Tbs. scallions, chopped
1 tsp. ground white pepper
1 tsp. cumin
1/4 tsp. crushed red pepper
1/2 tsp. salt
1 large eggbeat
1/3 cup bread crumbs
2 strips baconcook
Copyright Michael Chu 2004

Thursday, September 23, 2004

Test Recipe: Sauteed Zucchini with Mushrooms

When I came home last night, Tina informed me that she had already eaten dinner and wasn't hungry. So, I went outside and started my grill planning to throw on a New York (top loin strip) steak. Looking inside my refrigerator, I tried to devise a quick side dish that would get her to come join me while I ate dinner. Tina loves flavorful vegetables, so when I saw the zucchini and button mushrooms, I knew I could whip up something in the time it takes my steak to cook.

Zucchini, also called Italian squash, is a summer squash that is available year round. The term summer squash refers to the fact that the entire squash can be eaten (where a winter squash has a tough shell that is discarded). Many markets will sell small zucchini (four inches long) under then name "zucchini" while selling the more mature larger ones as "Italian squash". Both are the same variety, but at different maturities. The smaller zucchini tends to be more flavorful and is easier to cook. The larger zucchini have larger seeds and seed cavity. This makes it easier to over cook the zucchini into a mushy consistency.

Buy zucchini that is firm to the touch (if it feels soft, that means it is deteriorating) and no more than eight inches in length. Larger zucchini may have seeds that provide an unwanted texture in your dishes (but are excellent for stuffing). Wash the zucchini with a soft brush to remove the tiny bristles on the surface (they don't bother some people, but they irritate my hands).

While the grill was heating, I washed the two zucchini that I had (about eight inches in length each), chopped off the ends, and discarded them (the ends, not the squash). I then cut the zucchini lengthwise twice and chopped into quarter inch sections. I cleaned about 4 ounces of button mushrooms (cremini would probably add more flavor to the recipe, but this is what I had on hand) and sliced them. I grabbed a french shallot and minced about one tablespoon worth.


After running outside and slapping my New York steak on the grill (with celery salt, table salt, and white pepper), I came back in and heated a skillet with one tablespoon olive oil. When the oil stated to shimmer, I threw in the minced shallot and kept it moving in the pan until evenly browned.


Turning the heat to medium-low, I threw the sliced mushrooms on, tossed them so the oil evenly coated them, and went outside to flip the steak. Upon returning, I sprinkled a dash (two pinches or 1/8 teaspoon) of kosher salt over the mushrooms. After a few seconds, I tossed them again so the other sides would brown a little. Once a decent amount of liquid had evaporated from the mushrooms, I added the chopped squash to the pan, sprinkling on an additional dash of salt. I also went outside to move the steak to the lower heat side of my grill to finish.


Turning the heat back up to medium-high, I allowed the squash to cook, tossing them every ten or fifteen seconds. (At one point, I went outside to remove the steak from the grill and let it sit for the juices to redistribute.) Once some of the zucchini picked up some brown caramelized bits, I turned off the fire and poured the vegetables into a bowl.


I took the bowl, walked over to Tina, and held it close enough for her to smell. She joined me for dinner.


Sauteed Zucchini with Mushrooms (serves two)

1 lb. zucchini, choppedsautee (med-high)
4 oz. button mushrooms, slicedcook (med-low)
1 Tbs. minced shallotsbrown
1 Tbs. olive oil
1/8 tsp. kosher salt
Copyright Michael Chu 2004

Wednesday, September 22, 2004

Test Recipe: Albers Corn Bread

Recently, in the Forum JediLow asked for a cornbread recipe. So I thought I'd see how the Albers back of the box recipe does. In my experience, some of the back of the box recipes are horrible and some are excellent (Nestle Tollhouse Cookies). So, here we go.

Supermarkets in my area carry a brand of cornbread called Albers.


Here's the transcribed recipe from the back of this box of Albers Yellow Corn Meal.

Albers Cornbread
1 cup ALBERS Yellow Corn Meal
1 cup all-purpose flour
1/4 cup granulated sugar
1 Tbs. baking powder
1 tsp. salt
1 cup milk
1/3 cup vegetable oil
1 large egg, lightly beaten

PREHEAT oven to 400°F. Grease 8-inch-square baking pan.
COMBINE corn meal, flour, sugar, baking powder and salt in medium bowl. Combine milk, oil and egg in small bowl; mix well. Add milk mixture to flour mixture; stir just until blended. Pour into prepared pan.
BAKE for 20 to 25 minutes or until wooden pick inserted into center comes out clean. Serve warm.
NOTE: Recipe may be doubled. Use greased 13x9-inch baking pan; bake as above.

In the medium bowl, I placed the corn meal and flour. I measured out sugar, baking powder and salt as well. In the measuring cup, I poured whole milk and canola oil and broke a large egg into it.


I poured the sugar, baking powder, and salt into the medium bowl and gave the dry ingredients a quick whisk.


I whisked the liquids until they were smooth and poured it into the medium bowl over the dry ingredients.


After whisking briefly, I poured the batter into a greased 8x8 inch pan.


Into a 400°F oven it went and twenty minutes later I came back with a bamboo skewer. Plunging the skewer into the middle of the cornbread, I checked to see if anything stuck to the skewer as it came out. It came out clean, so the cornbread was done.


Normally, I'd cut the cornbread into nine pieces of 2-2/3 in. squares, but neither Tina nor I were hungry, so I cut it into sixteen pieces.


So, how did it taste? Tina and I both agreed that there was not enough sugar and for some reason there was a slight sour taste. I can't figure out what could have caused the sourness unless my canola oil had gone bad (I'm sure I would have noticed since I smelled and examined it beforehand). The baking powder should chemically counteract itself (in terms of acid and base reactions) and the milk was definitely not sour (since I had a glass with dinner).

In addition, I found the texture more gritty than what I like in a cornbread (I hate to admit it, but the cornbread I like is from Boston Market), but Tina felt the texture was about right and what she expected.

I'm going to have to test this recipe at least once more to see if the sour flavor persists.

Albers Corn Bread (serves nine)
Preheat oven to 400°F
1 cup yellow corn mealcombinestirbake 400°F 20 min.
1 cup all-purpose flour
1/4 cup granulated sugar
1 Tbs. baking powder
1 tsp. salt
1 cup whole milkwhisk
1/3 cup vegetable oil
1 large egg
Copyright Michael Chu 2004

Tuesday, September 21, 2004

Recipe File: Shrimp Scampi

Traditionally served over linguine, shrimp scampi makes a quick and easy dinner that works equally well eaten in front of the computer or as the main dish of a romantic candlelight dinner. I serve large shrimp (16-20 count) when I have company over, but for my own consumption, I use the less expensive 41-50 count variety. Cooking the shrimp in butter provides most of the flavor but garlic and parsley is essential to the dish. Linguine takes about the same amount of time to cook, which makes it the perfect compliment to shrimp scampi both culinarily and in terms of efficiency.

In the United States, shrimp is sold by "count". This is a rating of the size and weight of the shrimp. The count represents the number of shrimp in a pound for a given size category. For example, 41-50 count shrimp are composed of shrimp that weigh about 1/3 ounce each, while 16-20 count shrimp are an ounce each (or a little less) in weight. The lower the count, the larger the shrimp (and the more expensive).

Bring six quarts of water in a large pot to a boil. While waiting for the water to boil, peel one pound of shrimp, leaving tails on. Butterfly the shrimp by cutting the backs of each shrimp. While butterflying I also remove the vein (I think it's actually the alimentary canal) to avoid having gritty shrimp waste in my scampi. Rinse the shrimp and blot dry with paper towels. Once the water is boiling, stir in 1/2 tablespoon table salt and add one pound of dried linguine. (Cooking times for pasta varies by manufacturer. Use the instructions on the box, but be aware that many pasta manufacturers recommend cooking times that are to long for al dente. I suggest subtracting a few minutes from the cooking time and testing the pasta by biting down on it and looking at the cross section. There should still be a tiny speck of uncooked pasta when the noodles are al dente. Drain the pasta immediately; they will finish cooking as they stand.)

Melt four tablespoons of butter and two tablespoons of olive oil in the pan. Add about 2 teaspoons of minced garlic and 1/4 teaspoon salt (if using unsalted butter). Stir over medium-low heat until the garlic is lightly browned.


The shrimp should be added in a single layer on the pan (cook two batches if necessary). The shrimp can be cooked over low or medium heat. Over medium heat, the shrimp will form a slight crust and be golden brown when cooked. When the shrimp color changes and the flesh touching the pan is no longer translucent (about two minutes), flip the shrimps over with a pair of tongs or spatula.


Meanwhile, when the linguine is cooked to the desired level, pour the pasta into a collander to drain. Return the pasta to the pot or into a large bowl. When the second side of the shrimp is fully cooked (another two minutes), throw in one tablespoon chopped parsley and give it a quick stir. Remove from the heat and pour shrimp and butter over the pasta. Toss and serve with fresh grated parmesan, ground black pepper, and a slice of lemon.


Shrimp Scampi

1 lb. shrimpcook until opaqueflip; cook until opaqueadd
4 Tbs. buttermeltbrown
2 Tbs. olive oil
1/4 tsp. salt
2 tsp. minced garlic
1 Tbs. chopped parsley
Copyright Michael Chu 2004

Monday, September 20, 2004

Maple Syrup Grades

Recently, I used maple syrup in the Pecan Pie recipies. Most of us are familiar with the taste of maple syrup (from eating pancakes), but what is maple syrup and what do the grades mean?

What is Maple Syrup?
Maple syrup is made by reducing the clear sap from maple trees into a high concentration sugar suspended in water. When the maple sap is harvested, it is a watery liquid (not thick, sticky, and viscous like other saps we are familiar with). This sap mostly water, about two percent sugar (with some impurities). The sap is then boiled until much of the water has evaporated. During the boiling, impurities rise to the top and are skimmed off (like making a stock). Once enough water has evaporated so that the sugar content exceeds 67%, the sweet liquid is considered maple syrup. The lightness of color and strength of flavor is dependent mainly upon when the maple syrup was harvested and the weather and growing conditions of the maple trees for that year. Typically, lighter syrups are harvested earlier in the season.

Maple Syrup Grade
The United States Department of Agriculture (USDA) assigns grades to the maple syrup sold in the the U.S. These grades are: Grade A Light Amber, Grade A Medium Amber, Grade A Dark Amber, and Grade B. The grading of syrup sold in the United States is voluntary (like USDA Beef Grading).

Grade A Light Amber (or Fancy) is very light in color and has a faint, delicate maple flavor. It is usually made earlier in the season when the weather is colder. Many people use this grade for serving on pancakes. It is also widely used for making maple candies.

Grade A Medium Amber is darker and has an easily discernable maple flavor. I like using this grade for serving on pancakes and waffles. I also use it for baking since it has a stronger flavor than Light Amber.

Grade A Dark Amber is very dark and has a strong maple flavor. Some people like the stronger flavor and use it as a table syrup, but this grade is mostly used for cooking and baking.

Grade B, sometimes called Cooking Syrup, extremely dark in color and has an extremely strong maple taste as well as hints of caramel. Because of its strong flavor, this s predominantly used in baked goods.

Storage
Maple syrup should be refrigerated to ensure freshness (even if the bottle hasn't been opened). You can also freeze maple syrup to extend its life indefinitely. If the syrup is refrigerated in glass containers, then the syrup will maintain quality for a year. Plastic bottles are a little porous, so refrigerator shelf life is usually around three to four months. If you need to store syrup purchased in plastic bottles for longer term storage, pour it into a glass bottle or jar and refrigerate.

Use as a sugar substitute
In general, maple syrup can be substituted for granular sugar in baked goods by following these rules of thumb:
For each cup of granulated sugar, use 1-1/2 cup of maple syrup.
Reduce other liquids in the recipe by about one-half.
Add 1/4 teaspoon baking soda for each cup of maple syrup.
Decrease oven temperature by 25°F.

Pancake syrups
Most syrups sold as pancake syrups are not maple syrup. These syrups are made of either cane sugar or corn syrup and contain a few percent of maple syrup for flavoring. Real maple syrup has a more robust flavor and (as my wife says) tastes less man-made.

Thursday, September 16, 2004

Equipment & Gear: Cutting Boards

The surface on which you cut your meat, poutry, fish, and vegetables is as important as the knives you cut with. In this article, I'll examine some of the important considerations when choosing a board.

Size
The size of a cutting board is pretty important. Small cutting boards are convenient for clean up and cutting small things quickly (for example a garnish or some cheese). However, every kitchen should have at least one large cutting board. How large? As big as your sink. It's important to be able to wash your cutting boards thoroughly, so it's important that the cutting board fits into your sink. When buying a cutting board, the bigger the better (as long as it fits in the sink). Why? The larger surface area gives you more space to work with. It helps with posture too. You won't be cramped up trying to fit everything on the board, move the food into position, and drive the knife at the same time.

The thickness of the cutting board is dependant on your height as well as your kitchen counter height. If you get a really think block and place it on your counter, you may have to bend your shoulder and elbow at awkward positions when you cut. This will lead to muscle aches and pains and maybe even damage. Get something with dimensions that feel comfortable to you.

Once an appropriate size of cutting board has been chosen, the question of buying plastic or wood comes up. Which is better for the knife? Which is safer? What's the best value? These are some questions that come up when choosing between these two materials. We'll try to address them here.

Surface
Most wood boards are made of a hard wood like maple or pine which may give your kitchen a much more attractive look than plastic boards. A good, sharp knife will cut into a wood board to some degree, so be forewarned that the cutting surface of your elegant wood cutting board will look worn, especially if you are heavy handed. The grain of the wood also helps keep the food from slipping.

A plastic board will usually have a roughened surface to aid in keeping food from slipping off. Most people would say that a plastic board's appearance leaves much to be desired, but it's size, shape, and weight make it extremely handy around the kitchen. Unfortunately, no matter what a manufacturer claims about how gentle the plastic is on knives, there is no substitute for cutting on wood to keep your knives in tip top shape.
Amazon.com: KitchenAid Poly Cutting Board with Santoprene Handles Because plastic boards are nonporous and nonabsorbent, it is easier to clean off stain causing fluids than from a wood board. Simply scrub and rinse. Of course, don't let juice from freshly chopped beets stay on your board and dry for cleaning the next day - stains will occur. However, most sharp knives will eventually carve grooves into the plastic surface where stains can form and bacteria can collect. The small fissures make it very difficult to properly clean the baord without giving it a bleach washing.

A properly oiled wood board will also help resist staining to some degree, but prompt washing is always the best policy to follow.
Amazon.com: Catskill Craftsmen Wood End Grain Cutting Slab Oiling a wood board once every couple of weeks is a great way to maintain the board. Oiling protects the board from soaking up too much moisture and cracking or warping. It also protects against the absorption of some bacteria. Use an edible oil that has no taste, but don't use vegetable oil because it will turn rancid over time. Mineral oil is a popular choice. Wood boards can also be sanded to return the surface to a smooth finish. Beware that after sanding the board should be washed, dried, and set out for several hours to eliminate bacteria that may have been released from the interior wood.

Grooves
Grooves are often carved into the edge of the cutting board to catch juices. Amazon.com: Catskill Craftsmen Reversible Wood Turkey Board with Groove Cutting boards with large grooves serve better for carving than for cutting. I recommend having a seperate carving board for carving and serving than the board you normally use for slicing and chopping for preparation.

Feet
Amazon.com: Catskill Craftsmen Wood End Grain Round Cutting Slab with Feet Some cutting boards have feet. This limits your cutting surface to one side of the board. With wood boards, feet are not necessary since placing the board on a wet towel or shelf liner will firmly cement the board to the counter. Depending on the weight and texture of the board, this trick can also work on plastic boards. Often, wood boards with feet work well as attractive carving boards or cheese boards.

Over the sink boards
Amazon.com: Target Over-the-Sink Cutting BoardFor the space limited kitchen, manufacturers offer both wood and plastic boards Amazon.com: Catskill Craftsmen Adjustable Wood Over-the-Sink Board that can be placed or hooked over the kitchen sink. Over the sink boards also make clean up easy when dealing with messy fruits or vegetables that make produce a lot of juice, like tomatoes.

Bacteria
It is often said that plastic is easier to clean than wood, but this is not necessarily the case. Foods that stain are much easier to clean off plastic, but if you're concerned about bacteria, plastic may not be the material you want to choose to use.
Amazon.com: Farberware 3-Piece Poly Cutting Board Set
Plastic cutting boards have a nonporous surface that provides no place for bacteria to dwell. However, bacteria can just as easily live on the surface and after using the board for a while, your knife will probably chew up the fine surface of the board providing plenty of hiding spaces for bacteria to survive even through vigorous washing. This is troublesome to deal with and it is wise to scrub the cutting board down immediately after using. What Amazon.com: Farberware 12x18 in. Poly Cutting Board with MicroBan about those plastic boards that have built in antibacterial chemicals? These only serve to inhibit bacterial grown that causes stains and odors - they do little to kill food-borne bacteria. If they did, you'd be ingesting poison agents every time you used your cutting board. Vigorous scrubbing with hot water and soap and an occassional cycle through the dishwasher is probably your best bet when it comes to plastic. (Be careful, some low quality boards may warp in a dishwasher.) Unfortunately, even a dishwasher's high temperatures may not be enough to kill all the bacteria. You're sure to kill the vast majority of them, though. Pouring bleach (diluted in water) over the board is also a good way of purging the board of bacteria. Once you've got the board clean, keep it dry. A few hours of complete dryness will kill the remainder of the bacteria. Make sure you prop up a corner of the cutting board if you're leaving it on the countertop so moisture won't be sandwiched under the board.

Wood cutting boards deal with bacteria in the opposite way that plastic boards do. Amazon.com: Farberware 3-Piece Wood Cutting Board SetWood boards actually absorb the bacteria into the wood. After the surface of the wood has been cleaned and dried, the bacteria near the surface dies. It turns out the wood near the surface forms a hostile environment for bacteria to live in. There are lots of bacteria living in the cutting board, but about 1/8 in. below the surface. This is deep enough that a heavy handed chop into the wood is unlikely to release bacteria (unless the wood splits). If your cutting board fits in your microwave oven, heating up the board in the microwave for 30 sec. or so will completely cleanse the board of bacteria, inside and out. As with plastic boards, prop a corner up to keep moisture from collecting.

Price
In general, plastic cutting boards are less expensive than wood cutting boards. For $10, you can purchase a set of cutting boards for cutting poultry, fish, and meats, or you can divide them up by size. For the same $10, a set of three wood boards will be servicable, but noticably lower quality. A good wood board can run upwards of $100, although a $10-20 board should make a great cutting surface. If you have expensive knives and don't mind oiling every couple weeks, then get a modest wood carving board. If you're on a budget, like the convenience of multiple cutting boards, and can stand dealing with vigorous scrubbing and the occassional bleaching, then plastic is the way to go.

Bamboo Amazon.com: Shun 14 in. x 14 in. Bamboo Cutting Board
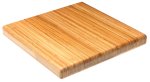
A "new" entry in the cutting board market are bamboo boards. Bamboo is an extremely hard grass that is easily grown and naturally replenishing resource. It doesn't have to be replanted after chopping down and is strong, durable, and pretty. Boards constructed of bamboo are fast (the hard surface makes it easier to work the knife) and durable. The boards absorb less liquid than maple wood and are typicaly easier to wash since the knive cuts won't be as deep or plantiful. Like other wood boards, they should not be soaked in water or placed in the dishwasher. The downside of bamboo boards is cost. Currently, the most expensive cutting boards that I know of, bamboo boards will run almost $200 for a large board. Browse Totally Bamboo for typical prices and a decent selection of boards and dishware.

Go to this site for a sampling of the cutting boards available for mail order from amazon.com.

Wednesday, September 15, 2004

Recipe: Traditional Pecan Pie

After baking the Chocolate Pecan Pie yesterday, I decided to bake a traditional pecan pie. Pecan pie fillings generally have a texture between custard and gooey. They are also very sweet. This is how I make a traditional pecan pie.

I start by turning on my oven to preheat. I'll be baking the crust blind, so I preheat to 400°F. While the oven is warming up, I throw the pecans onto a pan and slip them in for ten minutes to toast, stirring once or twice.


After the pecans are toasted, I set them aside to cool and then chop them up. If you chop them while they are hot, the pecans will crumble. It's best to wait the few minutes for them to cool off.


Once the oven has been heated, blind bake the crust. This can be performed simply by lining the inside of the crust with a sheet of aluminum foil or parchment paper. Fill the foil or paper lining with pie weights (ceramic beads that keep the crust from rising and puffing up when baked empty). If you don't have pie weights handy, simply pop holes in the crust (bottom and sides) with a fork. (Make sure the crust is thawed if you're using a frozen crust.) Slip the pie crust onto the center rack and bake until the crust is light golden (about 10 minutes). In the meantime, assemble the filling.

The ingredients I use in the filling are 4 tablespoons butter, 3 large eggs, 1/2 cup granulated sugar, and 1 cup maple syrup. Purists will notice that I am deviating from tradition here. Normally you would use corn syrup, more sugar, and more butter. I like the flavor that maple syrup brings and I think that it's plenty sweet already.

Whisk the ingredients together with a 1/2 teaspoon of salt to bring out the flavors.


It takes a bit of muscle to get it smooth because of the eggs, but keep at it until it's well blended. (Or use a mixer.)


Now, fold in the chopped pecans. The filling is ready now.


If everything was timed correctly, the crust should be light golden yellow to brown (ten minutes). Pull it out and reduce the oven temperature to 275°F. We're going to slow bake the pie to ensure the filling bakes evenly. A higher temperature might result in the center of the filling to still be liquid while the outside is overcooked.


Pour the filling into the crust and level it. Slip it into the middle of the 275°F oven and bake for 60 minutes.


The pie is done when you hold the sides and twist gently. The outer filling should not move and the inside should jiggle a little. Take it out and let it cool. This will allow the center to finish cooking and will let the pie set. Serve after fully cooled. I like to give it a bit of a refrigeration as well.


If you want to serve the pie warm, after the pie has been fully cooled, put it in an oven at 250°F for 15 minutes.


Traditional Pecan Pie (makes one 9 in. pie)

Preheat oven to 400°F
9 in. pie crustprebakepour and levelbake 275°F 60 min.
6 oz. pecans, toastedchopmix
4 Tbs. butterwhisk
3 large eggs
1/2 cup granulated sugar
1 cup maple syrup
1/2 tsp. salt
Copyright Michael Chu 2004

Tuesday, September 14, 2004

Test Recipe: Eric's Chocolate Pecan Pie

It has been only a couple days since I opened the Cooking For Engineer's Community Forums, and we're already getting some interesting posts, tips, and recipes. One of the ones that caught my eye was this Chocolate Pecan Pie recipe posted by ScatKat~ (Eric). I thought I'd give it a test and share with everyone the results.

Eric's recipe made two to three pies, so the first thing I needed to do was effectively halve the recipe. The new list of ingredients became 4 tablespoons of butter, 1/2 cup dark brown sugar, a large egg, 1/2 cup 100% pure maple syrup, 6 oz. pecans broken up by hand, and 6 oz. semi-sweet chocolate. I decided that since we're interested in testing fillings here, I would take the easy way out and use a store bought frozen pie crust.


Eric uses Ghirardelli's Double Chocolate chips in his recipe and warns against the use of milk chocolate. (Double Chocolate is Ghirardelli's branding for bittersweet chocolate for baking.) I was picking up the necessary ingredients at my local supermarket (Save Mart) on the way home from work and was surprised to find that they do not carry bittersweet chocolate chips at all. I picked up a bag of Guittard's Semi-Sweet Baking Chips and thus deviated from Eric's recipe a little (or maybe a lot).

First, I creamed the butter and brown sugar together.


Then I added an egg and mixed until it was fully integrated.


I scraped the bowl down once and added maple syrup. A few more seconds and my Kitchenaid stand mixer had the mixture smooth and consistent.


After removing the bowl from the mixer, I poured in the halved pecans and stirred by hand with a spatula. Then I added the chocolate chips and stirred and folded until the pecans and chips were evenly dispersed, about ten strokes.


The mixture is then poured into the pie crust and leveled. Normally, I would blind bake the crust to ensure that it doesn't get soggy. (Blind baking is where you bake the crust without filling to harden the crust. This gives the crust more structural support to handle a wet filling so it doesn't fall apart or soak up too much liquid before the filling is baked.) Eric's recipe didn't mention this and called for a fairly high heat of 375°F so I did not blind bake the crust.


I then baked the pie in my oven at 375°F until the filling set. I checked the filling by holding the pie on both sides and twisting gently to spin the pie pan. A set filling should not move on the outside and jiggle on the inside (like Jell-O). The pie was done after 45 minutes (just like Eric said).


Taste results: The pie is not your traditional pecan pie. This pie is quite chocolatey and less sweet than pecan pies that I've had from bakeries (which I felt was overwhelmingly sweet). I brought the pie into work and it was gone before I knew it with people asking for seconds (but there was none to give out). So, maybe Eric's original recipe of two or three pies would have been better.

The general concensus was that the pie was very good and a welcome departure from the traditional pecan pie. The chocolate lover's especially liked the chocolate chips and some commented on the excellent flavor that the maple syrup introduced. I recommend trying this recipe!


Eric's Chocolate Pecan Pie

Preheat oven to 375°F
4 Tbs. buttercreammixmixstirstirpour & levelbake 375°F 45 min.
1/2 cup dark brown sugar
1 large egg
1/2 cup maple syrup
6 oz. pecans
6 oz. semi-sweet chocolate
1 pie crust
Copyright Michael Chu 2004

Monday, September 13, 2004

Recipe File: Grilled Pork Chops

It seems the site has survived the unexpected rush of hits, so now it's time to return to the reason why I have this site: food and cooking.

I made my grilled pork chops a few days ago. Done correctly, pork chops can be juicy, fragrant and delicious. The recipe begins the night before with a rub, refrigeration, and finally grilling.

First, we'll need to start with the spice rub. You'll have your preference, but here's the one I created. I use 2 parts paprika, 2 parts chili powder, 1 part light brown sugar, 1 part salt, 1 part ground black pepper, 1 part crushed red pepper, and 1 part cumin. The rub can be made in any quantity and stored for use later. For a small amount use a teaspoon, for a large quality use a 1/4 cup (or more) per part.


Now, I grind the cumin and red pepper in a spice grinder until powdery.


Pour the spices together into an available spice jar. I had just finished a container of dried rosemary, so I used it after washing (and drying!). A salt shaker would work just as well.


Laying out the pork chops, I liberally sprinkled the surface with the rub. Then I took one to two teaspoons of dried thyme and sprinkled it over. Using my tongs, I pressed the rub and thyme into the chops before flipping and repeating the rub and thyme sprinkling.


The pork chops should refrigerate for about 8 hours before grilling to help the flavors really get into the meat. If in a hurry, I recommend at least an hour of refrigeration.

Build a two level fire if using charcoal and grill the chops over high heat for three minutes on each side (or until browned). Move to lower heat and cook until an instant read thermometer registers 145°F (63°C) [336 K].


Let stand for five minutes and serve!

Please note that trichinella larvae (the cause of trichinosis or trichinellosis) can survive in temperatures up to 170°F (78°C) [350K], but this usually produces a tough piece of pork. You can avoid danger of trichinosis by freezing the pork at 5°F (-15°C) [258 K] for 20 days. This will effectively kill any trichinella larvae.


Grilled Pork Chops (serves however many pork chops you have)
Grilled Pork Chop Rub

2 parts paprikacombine
2 parts chili powder
1 part light brown sugar
1 part salt
1 part ground black pepper
1 part crushed red peppergrind
1 part cumin

Pork chop(s)
1 pork chopsprinkle and rub both sidesgrill on high 3 min. per sidegrill on low until 145°F
grilled pork chop rub
2 tsp. dried thyme
Copyright Michael Chu 2004

Sunday, September 12, 2004

Community Forums

Since I'm on a new server with lots of bells and whistles, I thought I'd take advantage of some of them.

I've started a community forum that can be accessed at http://www.cookingforengineers.com/forum.

There's are forums for bug, feature requests, recipe swapping, cooking tips, and just general discussion (food related and not).

Friday, September 10, 2004

Welcome to the New Server

My wife was tired of listening to my screaming (in terror and delight) and clicking reload every second to see the update to my hits. About when I hit 12,000 hits an hour, she decided that it was time to leave work and go see a movie. So, now I'm back and it looks like during this period of time the site has moved from the old DotEasy servers to the Surpass Hosting servers. So, for a period of time, everyone's been looking at slightly older version of the Cooking For Engineers site (my backup). I just setup Blogger to properly update the new server, so we should be up and running.


I would like to thank everyone who donated to the site during this amazing time. (I would have posted everyone's names, but I was concerned for people's privacy.)

Also thank you everyone who offered to host my site and also gave suggestions on how to reduce my bandwidth usage.

Donations Please!

I'm getting hammered with traffic right now and I just upgraded my service to the maximum that I can in an attempt to keep this site alive.

If anyone wants to help out a little, I figure a dollar here or there will add up enough to help out. So if anyone wants, please make a paypal donation to help the website survive this.

Paypal (cash only): cooking@cookingforengineers.com
Unfortunately, I don't want to pay the fees for credit card payments, so I will have to deny any credit card donations. (If you don't want to donate, but want me to get a warm and fuzzy feeling, you can do a credit card donation - I'll know you care, but deny... unless it's a HUGE donation, then I'll take it!)

Increased Readership and Traffic Woes

All I can say now is: WOW!

On Wednesday, my readership started to increase from 20-40 hits per day to over 150 hits. I was starting to approach 1000 total hits and was pretty excited about that, when on Thursday I received almost 2000 hits. Right now, (a little past 2:30pm Pacific Daylight Savings Time) I have received almost 6000 hits for Friday.

Yesterday, with less than 2000 hits I exceeded by bandwidth traffic limitations for the MONTH. Thursday's transfers were in excess of 1 GB. I immediately upgraded the service from doteasy.com's free service to the highest tiered pay service, but that only gives me 20 GB per month. So, I'm in a bit of a pickle. I'm guessing the 20 GB will last only through the weekend.

So, I need suggestions on low cost HIGH traffic (I guess I'll need about 10 GB per day) servers that I can move my website to. I don't need too much space (100 MB will last a long time) because the site is currently only 8 MB.

As a warning this website might go down, but I'll do everything I can to keep it up and running.

I'm also thinking about putting up a paypal donation thing, but that isn't going to help unless I can find a host that will be able to allow enough monthly traffic for the website to survive.

You can post comments here or e-mail me at cooking@cookingforengineers.com.

Some Quotes

Here are some quotes that I've managed to collect since my site readership has skyrocketed. I thought I'd share. (Many are similar, but I've just been cutting and pasting quickly.)


--

I love the way you lay out the recipes on your site.

--

Cooking For Engineers is the blog/cooking school for the Asperger's generation.

--

From Steve Ivy, Cooking for Engineers. I really like the compact recipe format.

--

Ben turned me onto Cooking for Engineers. The recipes look dang tasty, but what really catches my eye is the way the recipes are graphically presented such that the preparation steps are naturally integrated with the ingredients list.
Brilliant. Definitely Tufte-worthy.

--

If you’ve ever played The Sims and had one of your sim learn to cook just so he doesn’t set the house on fire? Well Cooking for Engineers won’t help you with your sims, but this will help you comprehend how to make delectible meals without having to grok oft-confusing traditional-recipe-syntax.

I recommend you read through the site from day one, as there is lots of useful cooking references through there, like ingredient substitution, beef grades, smoke points of different oils, y’know, important stuff.

And if it’s all too geeky for you, try learning to cook from an octopus instead.

You owe The Internet Oracle Glutnix seconds of Tiramisu.

--
(http://del.icio.us/url/5f28736423ea56576cffeadf64e3011b)

Awesome information design for recipies, I can tell at a glance how to make it

--

Very clever data presentation

--

I like the way the instructions are presented

--

nassi-shneiderman like diagrams for the kitchen

--

I really like their recipe notation

--

Nice representation of postfix recipe notation

--

ie using charts to communicate recipes

--

I'm not convinced that there's any benefit to this layout style for the recipes. The idea of working your way down and then across is nice but it's limiting and leads to simplications and mistakes--you stumble upon things at the END like a pan size or oven temperature. The "traditional" recipe layout is set up the way it is for a reason; it's actually highly information-dense and nearly perfectly structured.

--

Those tables look like a nice addition to the traditional recipe. That way it's easy to check you didn't forget anything.

--

Awesome information design. One glance at the recipe diagrams and I was ready to make a Tiramisu

--

Can I just say, this is THE perfect site for someone like myself. I
cannot thank you enough for doing this. Awesome site. Thank you!

--

On a somewhat related note, I found the perfect website for someone like myself. I'm moving out, I'm going to have to spend more time cooking and I need a resource for some good recipes. On the night before I move out, I stumble upon Cooking for Engineers. I nearly shat my pants when I saw it. Even the recipes are laid out in a way only an engineer would appreciate. I will see you all from Irvine.

--

Michael Chu has an blog called Cooking For Engineers, which reminds me a lot of Good Eats with Alton Brown. But I really love Michael's recipe diagrams. Somehow they're so much easier to follow than your usual recipe card format. And now I'm hungry. Link courtesy of Waxy.org.

--

Depending on whether you feel cooking is more science or art, you may or may not take offense at what the name of this site implies: Cooking for Engineers (Personally, I think good engineers have equal parts creativity and logic floating around in their noggins, which also happens to be the right balance to be a good chef.)

Anyway, aside from the kludgey blog interface, there's some cool stuff here- plenty of pics and a slick way of displaying steps for preping ingredients in a one-look table format

--

I just thought I'd say that your format of directions is really intuitive. Maybe it's just because I'm an engineer though...

--

Michael- Terrific Blog. Stumbled across it at the bottom of the Silicon Valley news ezine I get. Kudos on the recipe format. I always wondered why reading recipes was so cumbersome. Your diagramatic recipes are really concise.

Keep up the good work!

--

I really like the way he shows the recipes. I wish all recipe cards were that simple and to the point. :)

--

I really like the way he shows the recipes. I wish all recipe cards were that simple and to the point. :)

--

I've been looking for a better way to get recipes going. Well you have found it my friend, bravo!
I think this will be the standard very soon!

--

And recently I discovered a cooking blog that is designed for engineers, named, not surprisingly, Cooking for Engineers. Marvel at the elegance and beauty of the recipe diagrams. I have no idea whether the dishes are any good, but the recipes themselves are works of art.

Wednesday, September 08, 2004

Recipe File: Simple Tiramisu

Tiramisu has recently become an extremely popular Italian dessert that is now served in virtually every Italian restaurant. Originally served in the afternoon as a "boost", tiramisu contains both caffeine and alcohol in a creamy cheese mixture served in layers. Tiramisu can be complex (featuring layering of different flavors and textures) or simplistic. This recipe does not use any eggs (cooked or raw) and provides the simplest blend of ingredients to form a fast and tasty basic tiramisu.

First, start by assembling the ingredients. We'll need one pound of mascarpone cheese, a cup of heavy whipping cream, 1/2 cup granulated sugar, 3 tablespoons rum (brandy also works well), ~20 lady's fingers (a light, oblong italian cookie with powdered sugar on one side), cocoa powder, a double shot of espresso, 1/2 cup of coffee, and shavings of unsweetened dark chocolate to top (1 oz. should do).

Chill whipping cream and bowl. Mix coffee and espresso and chill.

Beat whipping cream until stiff peaks.

Put the cheese, sugar, and brandy into a medium bowl and mix until smooth. Add more sugar or alcohol as desired. Fold in whipping cream to create cheese mixture.

Soak lady fingers in espresso for a couple seconds, rotating to coat all sides. Place lady fingers side by side on bottom of a 7x7 pan.

Put half the cheese mixture on lady fingers in pan. Smooth with a spatula or spoon. Sift cocoa powder liberally on surface of layer.

Apply second layer of lady fingers and remaining cheese. Sift cocoa powder and half of chocolate shavings.

Cover in plastic wrap and chill.

To serve, use the remaining chocolate shavings by sprinkling a bit onto eight plates. Cut tiramisu into eight rectangles and serve on plates (or simply spoon them out).


Basic Tiramisu (serves 8)

about 20 lady's fingersdiplayer & spread twicecover
2 shots espressomix & chill
1/2 cup coffee
1 cup heavy whipping creamwhisk to stiff peaksfold
1 lb. mascarpone cheesemix
1/2 cup granulated sugar
3 tablespoons rum (or brandy)
cocoa powder
shavings of unsweetened dark chocolate
Copyright Michael Chu 2004

Wednesday, September 01, 2004

Freezing Meats

How long can meat be safely frozen? What is freezer burn and how do I avoid it? How do I safe thaw meat? I'll discuss these questions and more in this article on freezing meats.

Freezing Duration
Frozen meats can be safely frozen indefinitely as long as your freezer maintains a temperature of 0°F or lower. At this temperature, bacteria, yeasts, and molds are inactive (not destroyed). Freezing meat simply stops the clock when microbes are concerned. So, if a piece of meat is about to go bad when you freeze it, it's about to go bad when after you thaw it. It's best to freeze fresh meat shortly after purchase unless you plan on using it.

Enzymes are not stopped by freezing, but merely slowed down, so the quality of the food may diminish over time. This is not a safety issue, but a food quality conern.

Freezer Burn
An avoidable quality detractor is freezer burn. Freezer burn occurs when air comes in contact with the surface of the food. Frozen water on the surface or just under the surface sublimates (like evaporation except going from solid directly to vapor) into the air. (This is the same reason why ice cubes slowly "disappear" in the freezer.) This causes moisture to be lost from the meat over time resulting in discoloration and a dry, leathery texture. The meat is still safe to eat, but the freezer burned sections won't taste good. Simply cut the affected portions off before or after cooking.

The risk of freezer burn can be minimized by good packaging. Although you can safely freeze meat in the packaging provided by the market, the plastic used are usually air permeable. Repacking the meat so that as little air as possible comes into direct contact with the food will reduce the chances of freezer burn. Some effective solutions are to pack the meat in liquid (like chicken parts in broth), vacuum sealing, wrapping in heavy-duty aluminum foil, or using a plastic freezer bag.

Packaging Meat For Freezing
Here's how I freeze inidividual pieces of meat:
First I place the a portion of meat onto a large piece of heavy-duty aluminum foil.


Fold two sides over so they meet in the center. Take the overlapping foil and fold in half to form a seal that runs along the package. Fold again in half in the same direction to form a double seal.


Flatten the open ends to form two flaps. If the flaps are long enough to overlap, fold them over the meat and fold the overlap in half to form a seal. Fold again to form a double seal (as shown below). If the flaps are not long enough to overlap, simply fold each flap in half and once again to seal the ends. The foil should fit tightly against the meat.


After all the meat has been wrapped, label a plastic freezer bag and place foil wrapped meat inside. Squeeze as much air as possible out of the bag and seal. Plastic bags that are not rated for freezing may be gas permeable and may result in freezer burn if frozen for longer than two months.


Wrapping the meat in aluminum foil first keeps portions separate, seals each piece of meat, and allows me to selectively thaw or refreeze portions. When freezing meat in liquid (for example, chicken pieces in broth), I just place the meat and liquid in a freezer bag and make sure that the meat is either in direct contact to the bag or covered by the liquid during freezing.

Thawing
There are a few safe methods of thawing meat, but only one way that allows you to refreeze the meat if you don't use it. Thawed meat inside the refrigerator is safe to be refrozen as long as the refrigerator maintains a temperature of 40°F or less.

1. Refrigerator - Takes a long time to thaw (one or two days for modest sized meats, 5 hours per pound for large meats like whole chicken or turkey). Results in an even thaw (same temperature throughout once it is done). Can be frozen after thawing.

2. Cold Water Bath - Place the meat in a leak proof bag and submerge in cold water until defrosted. Change the water every 30 minutes to an hour for the duration of the thaw. Cook the meat immediately. Do not refreeze.

3. Microwave Oven - Follow the directions provided with your microwave oven when defrosting. Meat usually comes out unevenly defrosted, so some parts may be warm (a prime breeding ground for microbes). Cook immediately. Do not refreeze.