Wednesday, August 25, 2004

Recipe File: Slow Simmered Spicy Barbeque Sauce

There are many recipes for making barbeque sauces. Some are quick and simple - combining the primary flavors into a simple sauce or dipping and basting. Other recipes take a lot of time and produce a complex layering of flavors. Although the flavors may be complex, it's not necessary for the procedure to be complex. For example, this slow simmered recipe of mine is easy to throw together, requiring only the two or three hours to reduce the sauce to the desired thickness.

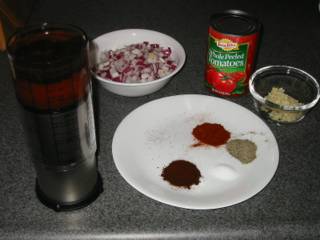
Start with 1/8 cup light brown sugar, 1/2 cup ketchup, 1 Tbs. mild molasses, 3/8 cup distilled white vinegar, 1/2 medium onion, chopped, 1/2 Tbs. chili powder, 1/2 Tbs. paprika, 1/2 tsp. salt, 1 tsp. ground black pepper, 14 oz. can whole tomatoes, and 2 large garlic cloves, minced.


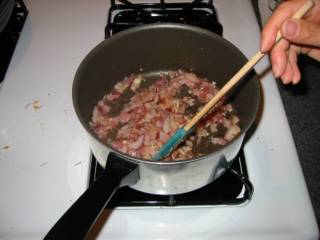
Heat two tablespoons of oil and add chopped onion and minced garlic. Cook until tender.


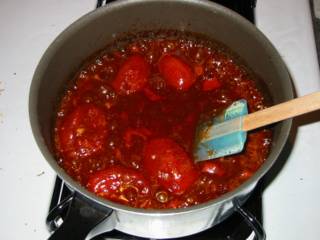
Putting the canned tomatoes aside, whisk the ingredients together and pour into the saucepan. Add the tomatoes with the juice in the can. Optionally, you can add 1/8 cup orange juice (or my favorite, pineapple juice) at this point. Stir over high heat until ingredients are integrated and begins to boil.


Reduce heat to low and allow to simmer uncovered. Simmer for two or more hours (stirring occassionally) until the sauce thickens to the desired level.


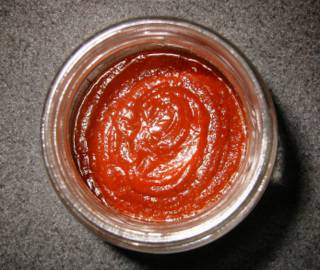
Although, the onions and tomatoes have probably disintegrated into the sauce, let the sauce cool a bit and pour into a bar blender for a quick puree.


This final barbecue sauce is rich and flavorful. I find that it start out with a sharp tangy flavor from the tomatoes followed by sweet molasses and punctuated with chili pepper spices at the end. Adding liquid smoke and other flavorings (or removing the spices) will tailor the sauce to your tastes.


Slow Simmered Spicy BBQ Sauce (makes about 16 oz.; recipe can be doubled)

2 Tbs. oilcook until tendercombine and bring to boilsimmer until reducedpuree
2 large garlic cloves, minced
1/2 medium onion, chopped
1/2 cup ketchupwhisk
3/8 cup distilled white vinegar
1/8 cup light brown sugar
1 Tbs. mild molasses
1/2 Tbs. chili powder
1/2 Tbs. paprika
1/2 tsp. salt
1 tsp. ground black pepper
14 oz. can whole tomatoes
Copyright Michael Chu 2004

Tuesday, August 17, 2004

Recipe Summaries - Standards and Microsoft

Until last weekend, the majority of my readers used some version of Internet Explorer to view my website. Something changed, and now I have a readership of which 75% are using a Mozilla based client. This is a problem for me because I have known about an issue with my website that I've been trying to fix for the last month and failed.

My recipe summaries don't display properly in browsers other than Internet Explorer. This is mainly because Internet Explorer is not fully CSS standard compliant and I had to come up with creative ways to get IE to present the table the way I desired it to. Unfortunately, some of the other browsers are standards compliant and render the tables awkwardly.

I've been working on this problem for the last couple days and when I come up with a solution, I will convert all my recipe representations over to the format that will at least work with IE and Firefox (that's my current goal).

Anyone know how to do vertical text in CSS with firefox? I rely on vertical text to save horizontal space in my recipes and use:
layout-flow: vertical-ideographic;
but this does not seem to work in Firefox.

The other issue I have is intersecting table elements (I need table elements to form non-rectangular shapes [like L's]). If someone can give me some tips, I'd be much appreciated.

Thanks,
Michael

Tuesday, August 10, 2004

USDA Beef Quality Grades

In most American supermarkets (not Safeway or Albertson's anymore because they are pushing their own brandings of Rancher's Reserve and Blue Ribbon), beef is sold with a USDA (United States Department of Agriculture) Quality Grade. Most people know that USDA Prime is the best (and most expensive) beef you can buy, and it is somewhat rare to find. USDA Choice and Select grades are common in supermarkets with Select being the cheaper option. But, what do the grades mean and how are they determined? I'll try to explain...

In the United States, all beef is inspected for safety by the USDA. The USDA also provides grading services that grade beef according to quality and/or yield. Both types of grading are optional and costs the producer (rancher) some money to pay for the USDA grader to provide a grade. We'll look at quality grades in this article since these are the most influential to the consumer. Two factors are used when the USDA grades beef for quality: physiological maturity and marbling.

The maturity of a beef carcass is determined by examining the bones and the color and texture of the ribeye muscle at the 12th rib. Examining the ossification (when cartilage turns into bone) of the backbone is one of the techniques used to help determine maturity. Each vertebrae has a bit of cartilage on top in young animals. This cartilage slowly turns into bone and generally begins to ossify from the rump and gradually proceeds up the back toward the head as the cattle matures. The level of ossification and area of effect helps to determine the age of the carcass. In addition, the shape and color of the ribs provides more information about the age of the animal. A very young rib will be red, narrow, and oval-shaped. Older animals will have ribs that are greyer in color, wider, and flatter.

In addition to looking at the bone structures, the lean tissue of the ribeye will help determine the physiological maturity of the animal. In a young animal, the muscle will be a light pink-red tone and the texture will be fine. While the animal matures, the lean tissue will become darker in color and more coarse.

Maturity is rated into five groups labeled from A to E (where A is the youngest). For most cattle, the age groups are approximately (some variation from sex to sex):
A - A < 30 months
B - 30 months < B < 42 months
C - 42 months < C < 72 months
D - 72 months < D < 96 months
E - 96 months < E

Marbling is the amount of fat that is distributed within a muscle (not surrounding the muscle). When determining marbling of a carcass, the quantity and distribution of fat in the ribeye at the 12th rib is examined. Beef with higher amounts of marbling usually produce more tender, flavorful, and juicy cuts. How maturity and marbling relate to determine quality grade is shown in the table below.

Maturity
MarblingABCDE
Slightly abundantPrimePrime / ChoiceCommercial
ModerateChoiceCommercialCommercial / Utility
ModestChoiceCommercialCommercial / UtilityUtility
SmallChoiceStandardCommercial / UtilityUtility
SlightSelectStandardUtilityUtility / Cutter
TracesStandardUtilityUtility / CutterCutter
Practically DevoidStandardStandard / UtilityUtility / CutterCutterCutter / Canner

For more information the Official U.S. Standards for Grades of Livestock and Carcasses can be found at http://www.ams.usda.gov/lsg/stand/st-pubs.htm.

Monday, August 09, 2004

Recipe File: Grilled Porterhouse or T-Bone Steak

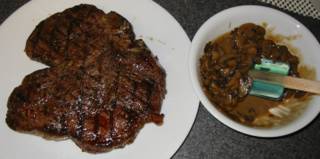
My favorite steak for grilling is a porterhouse steak. This is a beef steak cut from the loin that includes parts of two delicious muscles: the top loin and the tip of the tenderloin (or filet as in filet mignon). The filet is extremely tender with a buttery, melt-in-you-mouth texture when cooked to medium-rare. The top loin, also known as strip steak, New York strip steak, or Kansas City steak, has a more chewy texture preferred by some and is full of rich beef flavor. When I say the strip steak is more chewy, I mean it is a little more textured than the filet - you still don't need a steak knife to cut into it. To top it all off, I like to prepare mushrooms reduced in beef broth.

(A T-Bone steak is almost the same cut as a Porterhouse but with a much smaller section of the filet attached. Because of this, the T-Bone steak is a little less tender than a Porterhouse. Cook a T-Bone steak the same way as a Porterhouse steak.)

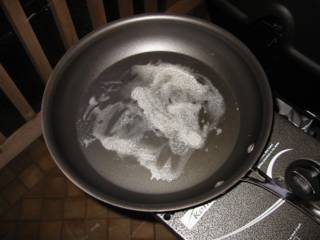
I prepared the mushrooms on the side burner of my propane grill while prepping and grilling the steak. First melt two tablespoons butter in a pan and allow the butter to foam.


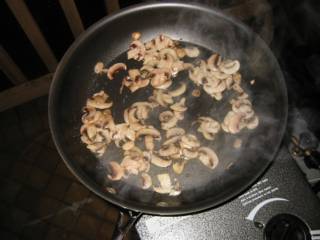
Place 8 oz. sliced mushrooms (button or medium cremini work well) in the butter and saute on medium heat until mushrooms give off moisture.


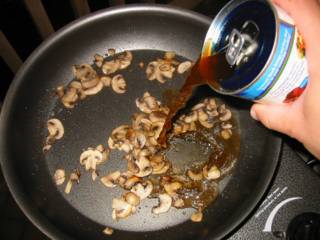
Once most of the moisture has boiled off, add a 14 oz. can of low sodium beef broth to the pan and allow the broth to reduce.


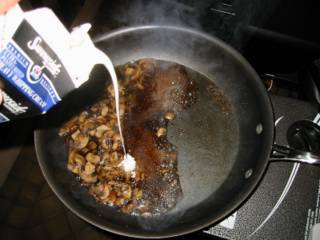
When the broth has reduced to the point where it coats the back of a spoon, add two tablespoons of heavy cream. While stirring, let the heavy cream reduce the sauce until it coats a spoon again. Remove from heat and set aside for topping the steak.


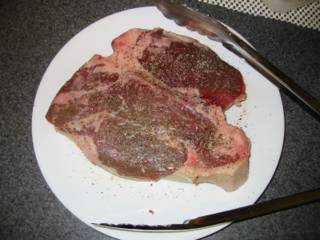
Meanwhile, build a two level charcoal fire or preheat your propane grill. Prepare your Porterhouse steak by seasoning with salt and pepper on both sides. I prefer to cook thicker steaks of about 1-1/4 inch to 1-1/2 inch in thickness (a little less than 2 pounds). During grilling, the thicker steak results in a more even medium rare throughout the meat.


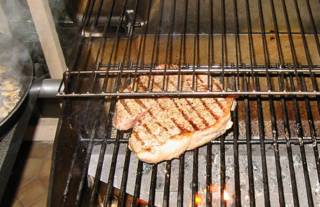
Place the steak on the hottest part of the grill and leave it there for 2 minutes. If using a propane grill, close the lid. On a charcoal grill, keep the lid off, but keep an eye open for flame ups and put them out with a squirt bottle or simply move the steak to prevent charring. After two minutes, flip the steak over and brown the other side - two minutes.


Once both sides have been browned, move the steak over to the lower heat and finish cooking. In general it should take about 7-8 minutes to cook to medium rare (internal temperature of 130°F), but because the building of fires is different every time, I recommend using an instant read thermometer to check the internal temperature. Just insert the probe from the side of the steak and plunge the probe into the center. Don't worry if it takes longer than eight minutes, that just means your heat is too low. Continue to let it cook until the internal temperature reads 130°F. Remove from grill and let the steak rest for five minutes loosely covered with aluminum foil.

The filet of the Porterhouse steak should not be cooked beyond madium rare or it may toughen. I solve this by rotating the steak such that the strip steak is closer to the high heat while the tenderloin cut is on the cooler side. This will cook the filet a bit slower and not dry it out while trying to finish the top loin. Serve with mushroom topping over the steak or on the side.


Grilled Porterhouse Steak (serves 2 hearty eaters)

1-1/4" Porterhouse or T-bone steaksalt & peppergrill on high for 2 min. each sidegrill on low until 130°F

Mushrooms
2 Tbs. buttermeltsauteereducereduce
8 oz. sliced mushrooms
14 oz. low sodium beef broth
2 Tbs. heavy cream
Copyright Michael Chu 2004

Sunday, August 08, 2004

Recipe File: Creme Brulee (Crème Brûlée)

This is one "fancy" dessert that you can make ahead of time (I did this batch while watching TV) with a minimum of effort and still have all your guests excited about your culinary skills. Creme brulee should start with a custard base that is richer, creamier, and silkier than other cremes (creme anglaise, creme caramel, flan, etc.). On top of that custard should be a layer of caramelized sugar. This sugar can thick or thin. A thick layer is usually produced by caramelizing sugar in a pot and pouring the liquid caramel over the custard. Thin layers (some as thin as paper) are produced by directly heating a sugar layer using a broiler or torch. I make my creme brulee with a torch and turbinado sugar.

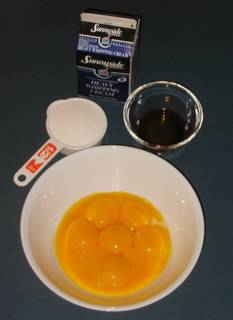
The ingredients needed are (clockwise from top) 2 cups heavy cream, 1/2 teaspoon vanilla extract, 8 large egg yolks, and 1/2 cup sugar.

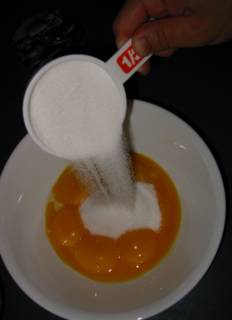
First pour the sugar into the egg yolks.

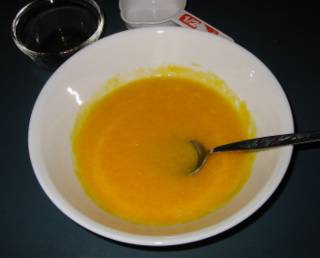
Beat the yolks until smooth.

Heat the heavy cream until almost simmering (you can bring to a simmer and let cool a minute). Add heavy cream to the egg yolks on tablespoon at a time while stirring vigorously. This will temper the eggs so as to not curdle them (or make scrambled eggs) when exposed to the heat of the heavy cream.
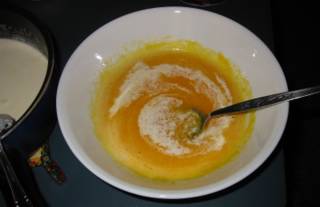

When about 1/4 cup of heavy cream has been integrated into the yolks, pour the yolks into the heavy cream and mix until smooth.
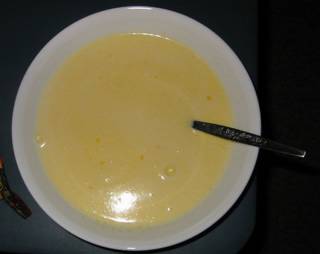

Now, use a fine mesh sieve and strain the custard mixture to remove and small clumps that may remain the mixture. This step will help ensure a silky texture to the custard. Blend in the vanilla extract after the mixture has been strained.
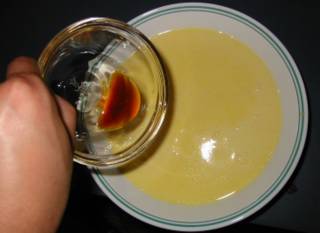

Pour the mixture into six to eight ramekins depending on size. (Makes a little more than eight four ounce creme brulees.) In the picture below, I filled six four ounce ramekins and two six ounce ramekins (the six ouncers were not full).
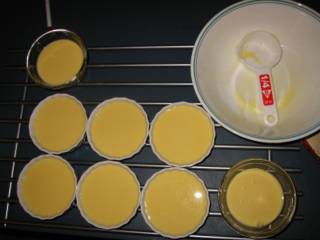

Place the ramekins in a baking pan. Pour boiling water into the pan (be careful not to get water into the ramekins), so that the water level is halfway up the sides of the ramekins. Cooking the custards in a water bath will provide a low even temperature for the custards to cook evenly and set properly. Place in an oven preheated to 250°F for about one hour.
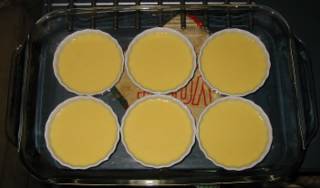

After an hour, check to see if the custards are done. We want them to be set on the outside edge, but jiggly (like jello) at the center. The easiest way to do this is to take a pair of tongs with food grade rubber bands wrapped around the ends to help grip the ramekins. Pick up a ramekin and shake to see if the centers jiggle. If the only the center jiggles a little, it's done. If the whole thing is set, remove immediately - it'll be a little over done, but still delicious. If it's not done, just put it back in the water bath and check again in ten minutes. Once the custards are done, let them cool on a cooling rack to room temperature. This will let the custards finish cooking the centers on their own.
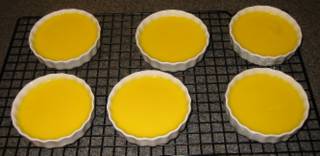

Wrap in plastic wrap and refrigerate for at least eight hours before serving.

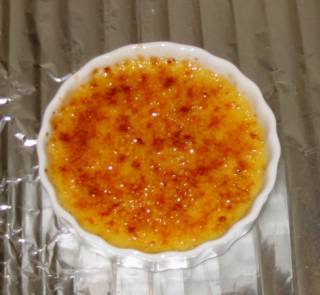
About an hour serving, remove the plastic wrap from each ramekin and use a paper towel to gently soak up any moisture that may be extruded from the custard tops. Pour about a teaspoon of turbinado (sugar in the raw) sugar in the middle of each custard. Gently tilt the ramekin and let gravity and gently shaking move the sugar around until the top surface of the custard is covered evenly with turbinado sugar. Using a kitchen butane torch, propane blow torch, or welding torch (whatever strong open flame you've got lying around), heat the sugar until it bubbles and changes color. With a small butane torch, I take my time and don't move from one side of the creme brulee to the other until the spot I've been working on has achieved the brown color that I want. This takes a little over a minute for each creme brulee. (The process is faster with a larger torch.) Don't worry about heating up the custard underneath, we'll refrigerate the creme brulee for a bit before serving. Do worry about lighting your kitchen counter on fire. I usually place the ramekin on a piece of aluminum foil placed over a cooling rack.

Once you're done scorching your cream, place the ramekins back in the refrigerator for about 45 minutes. The caramel will still be hard, but if you wait too much longer, the sugar will start to soften and dissolve into the custard.


Crème Brûlée (serves eight)

8 large egg yolksmixtemper and mixstrainmix250°F for 1 hour in water bathrefrigerate 8 hourscaramelize
1/2 cup sugar
2 cups heavy creamheat until almost simmering
1/2 tsp. vanilla extract
1 tsp. turbinado sugar
Copyright Michael Chu 2004
Thursday, August 05, 2004

Recipe File: Lemon Bars

For the last couple days, I had a craving for lemon bars. Lemon bars are sweet lemony cookies that have a gooey top and a shorbread base. Throughout high school I ate a lot of Lemonheads which are sour lemon hard candies. Perhaps because of this, I like to have my lemon cookies to have a nice and strong lemon flavor. The best recipe for lemon bars I've found is from Baking Illustrated. It is also a simple recipe to execute.

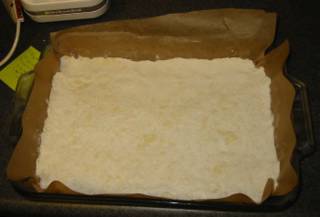
Line a 9x13 in. baking pan with parchment paper. The easiest way to do this is to rub some butter on the pan and place a sheet of parchment paper down. Then put some more butter on the parchment paper and place another sheet of parchment paper down perpendicular to the first sheet. This will line all the sides of the pan and not have lemon bars stuck to the side.

In a food processor with steel blade, combine 1-3/4 cups all purpose flour, 2/3 confectioner's sugar, 1/4 cup cornstarch, and 3/4 tsp. salt. Pulse a few times to mix. Cut 3/4 cup unsalted butter into 1 inch pieces and add to processor bowl. Process until the flour forms a coarse meal texture (about 12 seconds). Pour the flour mixture into the pan and spread evenly. Using your hands, press down on the flour mixture and compact it evenly to produce a consistent thickness of about 1/4 in. If you like, you can press the mixture up the sides of the pan about 1/2 in., but I don't bother. Refrigerate the crust for thirty minutes to firm it up and then bake at 350°F until golden brown (about 20 minutes).


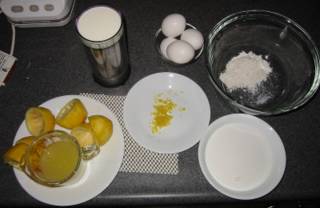
While the crust is baking, throw together the filling. We'll be using (from left to right) 2/3 cup lemon juice, 1/3 cup whole milk (do not substitute), 2 teaspoons lemon zest, 4 large eggs, 1-1/3 cups granulated sugar, 3 tablespoons all purpose flour, and 1/8 teaspoon salt.


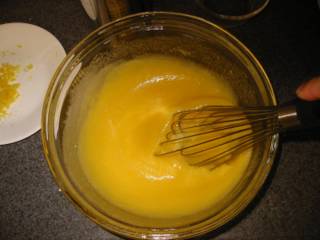
Whisk together the eggs, sugar, salt, and flour. (Baking Illustrated doesn't integrate the salt at this point - they mix it in with the wet ingredients, but I find it convenient to whisk the salt in with the dry ingredients.)


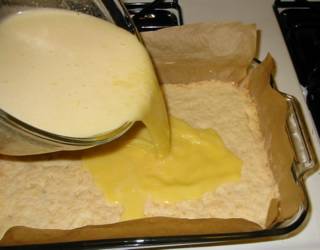
Stir in lemon juice, lemon zest, and milk until well blended. Once the crust is done baking, stir the filling once again to make sure it is well blended. Pour filling onto the still hot crust.


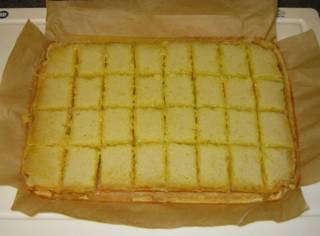
Bake until filling is firm to the touch (about 20 minutes). Remove from the oven and allow to cool to room temperature on a rack. After the lemon bars have cooled, lift the bars out by grasping the free ends of parchment paper and place on a cutting board. Use a pizza wheel or knife, cut into bars. I prefer to cut smaller bars (32 of them) because the filling is quite rich and strong.


If desired, serve with confectioner's sugar liberally sifted over the bars.


Seal uneaten bars in plastic wrap and consume within two days.


Lemon Bars (makes 32 bar cookies)

1-3/4 cup all purpose flourmixprocessline 9x13" panrefrigerate for 30 min.350°F for 20 min.350°F for 20 min.cool and cut
2/3 cup confectioner's sugar
1/4 cup cornstarch
3/4 tsp. salt
3/4 cup butter
4 large eggswhiskmix
1-1/3 granulated sugar
3 Tbs. all purpose flour
1/8 tsp. salt
2 tsp. lemon zest
2/3 cup lemon juice
1/3 cup whole milk
Copyright Michael Chu 2004
Recipe File: Garlic Roasted Potatoes

Roasted potatoes make a great addition to any dinner. The best roasted potatoes are full of flavor, crispy on the outside, and soft and velvety on the inside. This can be accomplished easily while preparing your main dish.

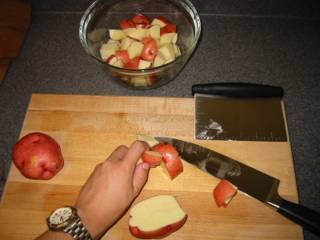
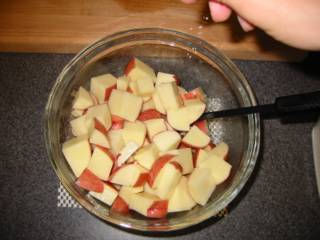
First, I start with two pounds of red potatoes. Cut the potatoes into 3/4" to 1" wedges.


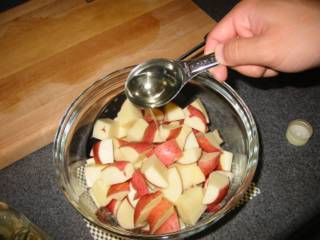
Toss with 3 Tbs. oil until all pieces are coated.


Salt and pepper the potatoes generously. Toss until salt and pepper have evenly disbursed.


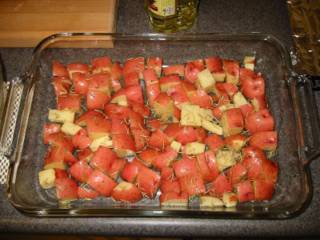
Place the potatoes in a 9x13 in. baking pan. Arrange the pieces so that the skin side is facing up. This will give us a nice crust on the cut side as it bakes. If desired, sprinkle 1 teaspoon of crushed dried rosemary over the potatoes.


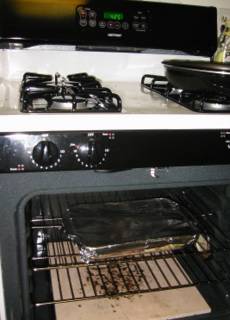
Cover the pan with aluminum foil and bake for twenty minutes at 425°F. This will allow the potatoes to bake in their own steam to help the insides fully cook.


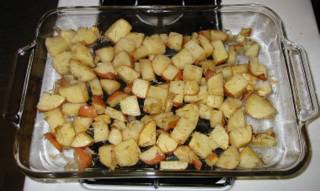
After twenty minutes, remove the aluminum foil and continue to bake for fifteen more minutes. Using a metal spatula, flip all the potato pieces over so the skin side is now touching the bottom of the pan. Try to keep as much of the crispy crust that has formed on the potato pieces as you flip.


Another 15 minutes in the oven and the potatoes should be done. You can keep cooking to achieve the level of color that is desired on the cut side of the potatoes. I usually stop once it reaches a light golden color.

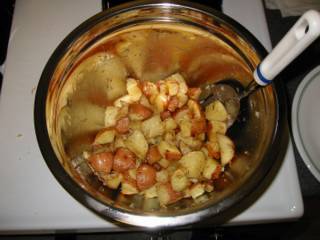
For a strong garlic flavor, simply puree 2 cloves of garlic (once garlic has been minced, scrape with a knife to create a fine mush OR use a zester on the garlic cloves) and put it in a medium bowl. Using a metal spatula, scrape the potatoes out of the pan and into the bowl. The hot potatoes will just barely cook the garlic. Toss well.


For a milder garlic flavor, cook the garlic in a teaspoon of oil until it softens (just before it begins to brown). Toss the cooked garlic with the potatoes.


Garlic Roasted Potatoes (serves four to six)

2 lb. red potatoes, cut into wedgestossskin up in pansprinkle425°F for 20 min. covered425°F for 15 min. uncoveredflip to skin down in pan425°F for 15 min. uncoveredtoss
3 Tbs. oil
salt & pepper
1 tsp. crushed dried rosemary
2 cloves garlic, pureedcook (optional)
Copyright Michael Chu 2004