Monday, July 26, 2004

Recipe File: Basic Granita

Granita is an easy and tasty treat for the summertime that doesn't require any special equipment. It can be made with virtually any sweet liquid - juice, diluted italian soda syrup, soft drinks, etc.

In a medium saucepan, combine the sugar and water and bring to a boil, stirring until the sugar dissolves. Let cool. Stir in the fruit juice and lemon juice and pour into a chilled 13- by 9-inch metal baking dish. Place in the freezer and freeze, stirring every 30 minutes until the mixture is firm.

Bring 1 cup water with 1/2 cup granulated sugar to a boil.


Allow sugar and water to cool to room temperature. Pour three cups of orange juice or other fruit juice into the cooled syrup.


Pour mixture into 13 x 9 in. baking pan and place in freezer. I had to use an 8 x8  in. pan because all my 13 x 9 in. pans were in use. It takes about twice as long to freeze in an 8 x 8 in. pan.


Every twenty minutes (forty if using an 8 x 8 in. pan), take the pan out and scrape the frozen mixture with a fork until all the frozen pieces are broken into small shavings and mixed well with the remaining liquid. Continue to freeze. Scrape every twenty minutes until no more liquid is in the granita.


I like to serve the granita in a wine glass with some lemon zest and a sprig of mint on top.


Basic Granita

1 cup watermixboilcoolmixfreeze scraping every 20 min.
1/2 cup sugar
3 cups fruit juice
2 tsp. lemon juice
Copyright Michael Chu 2004

Friday, July 09, 2004

Recipe File: Meat Lasagna

Homemade lasagna is always a favorite at potlucks or a nice dinner at home. Although it has many ingredients, the recipe is pretty hard to mess up (although I did mess up while making this one). Here's my recipe for a simple meat lasagna.

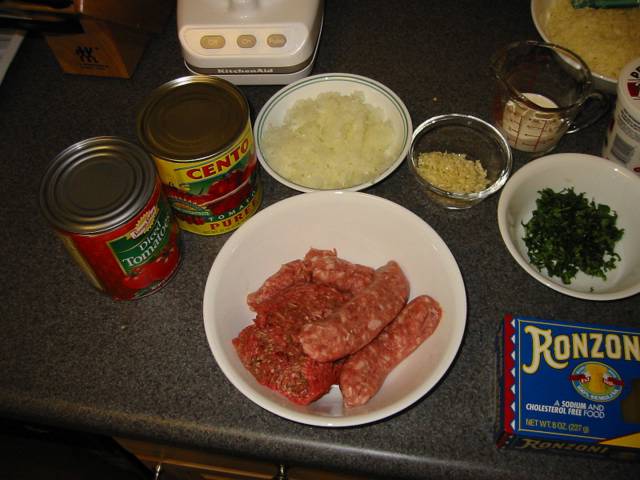
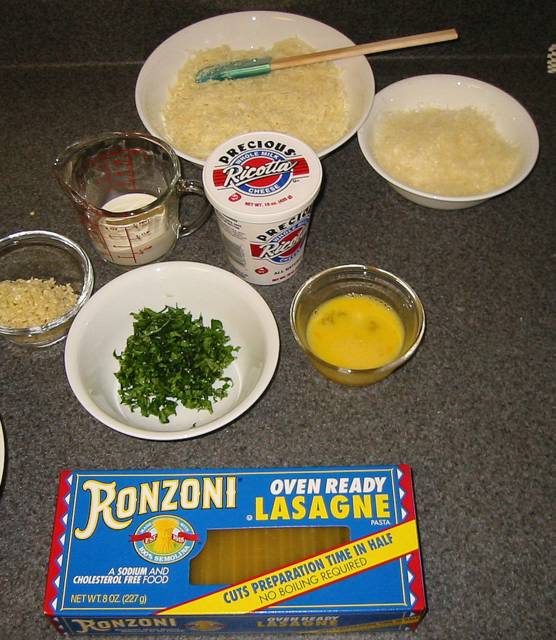
There's quite a few ingredients, so I took two pictures: sauce ingredients and layer ingredients.

To speed things up, I use a food processor to finely chop six cloves of garlic and then a medium onion. In addition, I use a 28 oz. can of pureed tomatoes and a 28 oz. can of diced tomatoes. For the meat, I use 1/2 pound ground beef and 1/2 pound italian sausage with the casings removed. I used ground beef from the round for the illustrations because it happened to be on sale. Ground chuck is also excellent. A 1/4 cup of heavy cream is also needed for the sauce.


For the layers, I use 15 oz. container of whole milk ricotta cheese, 16 oz. mozzarella, 1-1/4 cup Parmesan cheese, 1 large egg, and on 8 oz. package of oven ready (no-boil) lasagna pasta. I grated the mozzarella in the food processor and used a microplane zester to grate the Parmesan cheese. Avoid using the pregrated cheeses because they are often additives that keep the cheese from clumping and make them last longer, but alter the taste. The egg should be lightly beated with a fork. We'll come back to these ingredients in a few minutes.


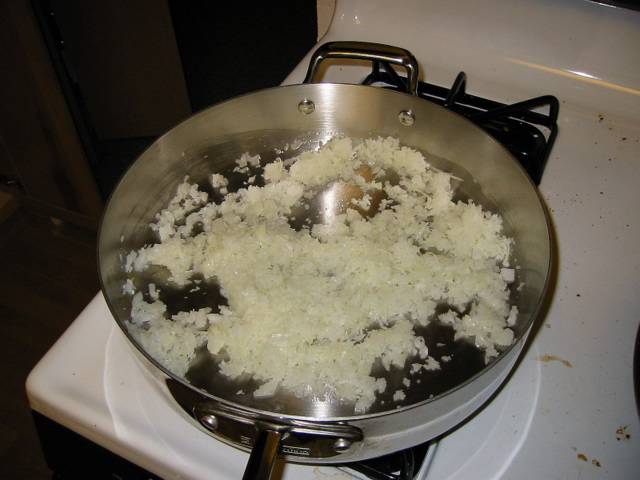
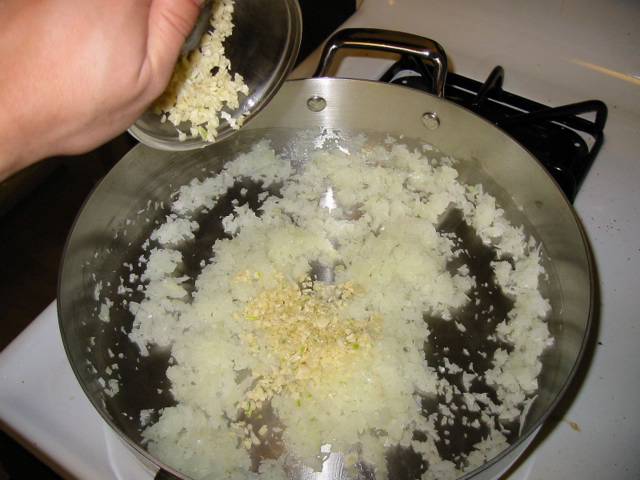
First, heat a large pan or pot (a dutch oven works well) over medium flame. I used a six quart saute pan for this article. Pour 1 tablespoon oil into the heated pan. After it begins to shimmer, put the finely chopped onions into the pan. Cook for about two minutes, stirring occasionally. We want the onions to soften but not brown.


Add garlic at this point and cook for another two minutes - stirring occassionally. Try not to brown the garlic.


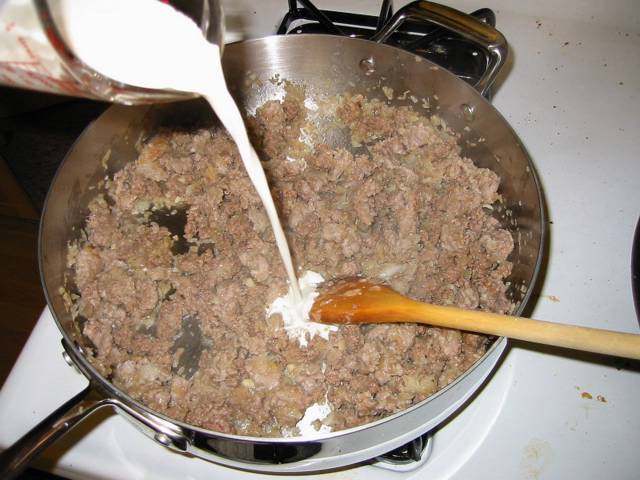
Once the garlic is fragrant, add the ground meat and increase heat to medium-high. Break up any large clumps of meat while stirring. I use a wooden spoon and just jab at any large pieces. Add salt and pepper to taste (I like about 1/2 teaspoon of each). Cook until the meat loses it's pink color, but not start to brown (about three to four minutes). Now stir in 1/4 cup heavy cream to help hold the meats together a bit. Allow the mixture to simmer and thicken until most of the water in the cream has evaporated.


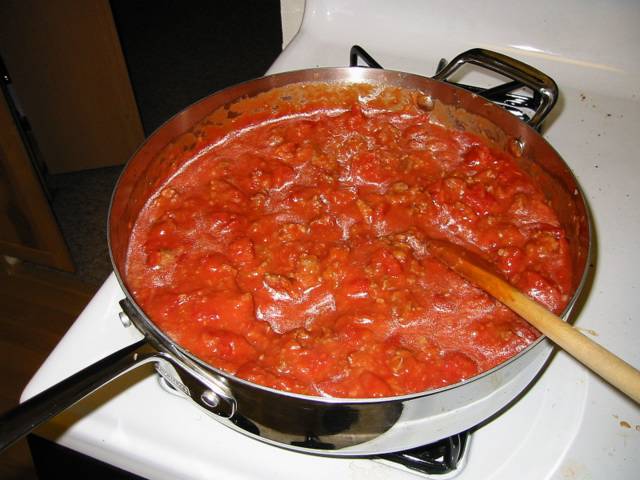
Now, add a can of pureed tomatoes and a can of diced tomatoes (drained). Stir the mixture until evenly distributed and bring to a simmer. After bubbles begin to form, lower the heat to low and cook for a few more minutes. The sauce is now done and we can set this aside to work on the layers.


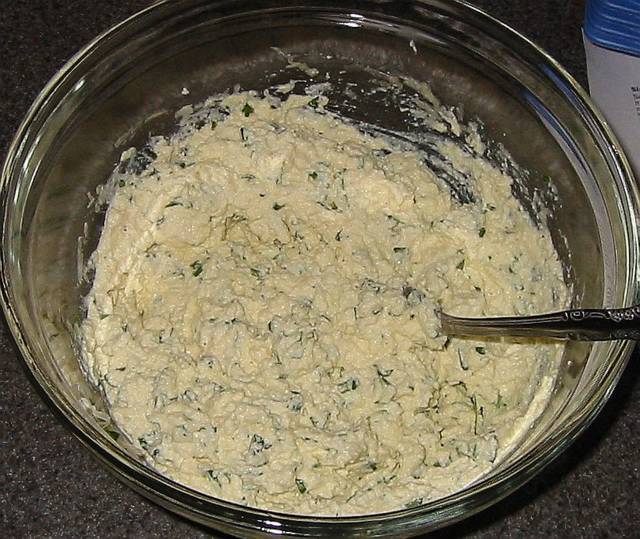
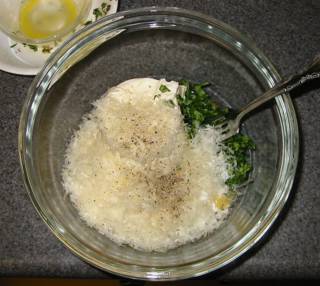
For the layers, put the ricotta cheese, a cup of parmesan (reserving 1/4 cup for use later), the chopped basil, beaten egg, and some salt and pepper (about 1/2 teaspoon each works well) into a medium bowl for mixing.


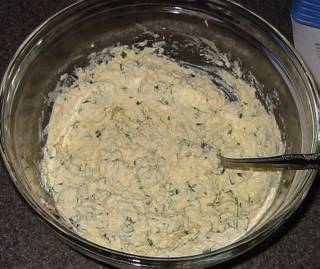
Mix the ricotta and flavorings together with a fork, spoon or spatula until it's relatively smooth.


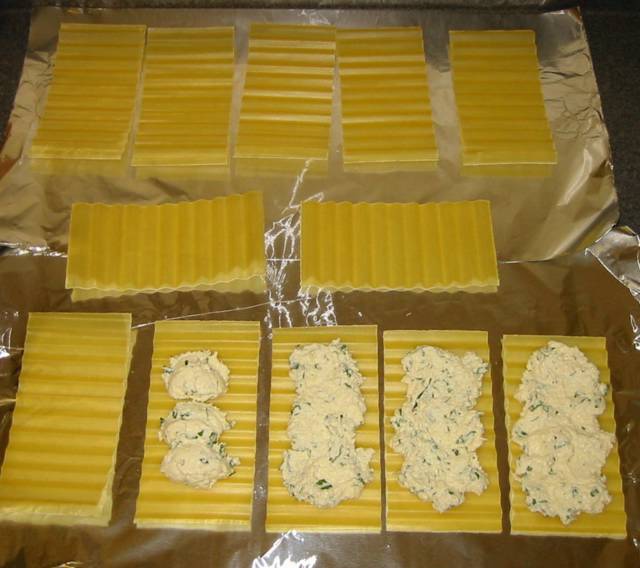
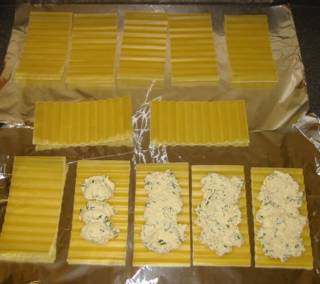
Now, we're ready to build the lasagna. Most of the time, people build the lasagna in the 13 x 9 in. baking pan, but I saw an episode of America's Test Kitchen where they prepared the layers outside of the pan. This turns out to be an easy and fast way of putting the layers together (also works if you have a helper in the kitchen - one person can prepare the layers while the other builds the lasagna). This method starts by laying out all twelve pieces of the lasagna pasta. Then spoon the ricotta mix unto each pasta piece - about two tablespoons each. Distribute any excess evenly and flatten the ricotta onto each pasta piece.


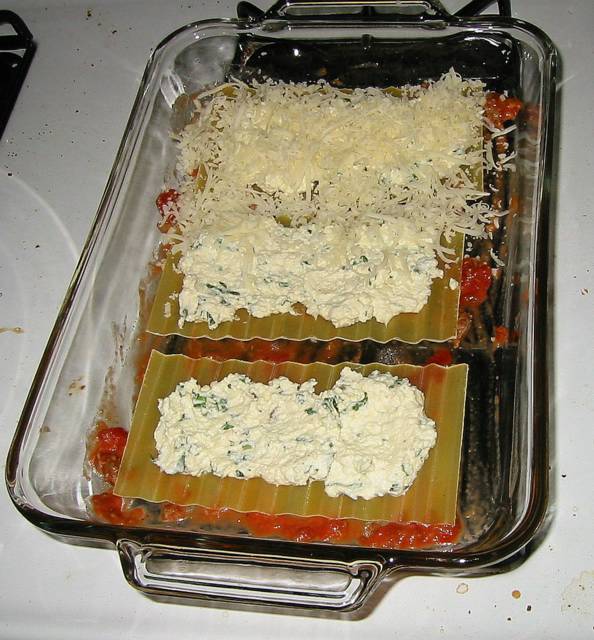
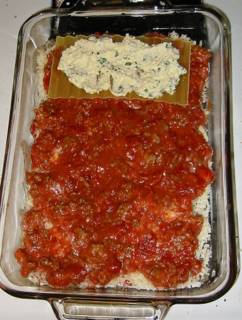
Assembling the lasagna is easy, but pay attention to what you are doing and how many layers there will be (I didn't and ran out of meat sauce because I was too liberal with it on the bottom layers). Prepare a 13x9 in. baking pan by applying a thin layer of meat sauce to the bottom, using just enough sauce to coat.


Then place three lasagna pasta (with the ricotta facing up) into the pan. Then cover the pasta with a fourth of the shredded mozzarella cheese.


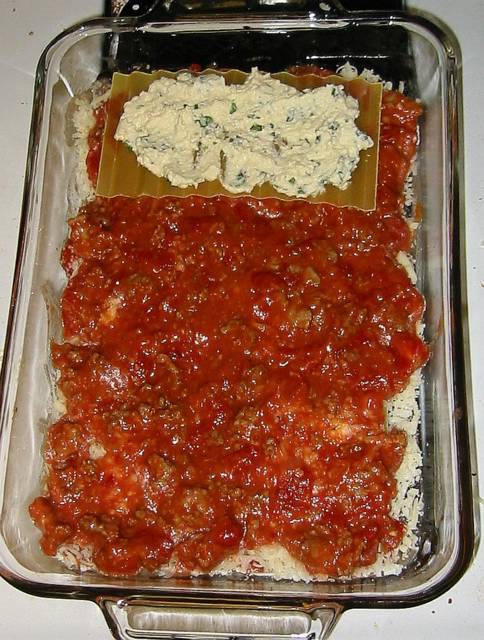
Spoon enough meat sauce to cover the mozzarella and place another layer of lasgna pasta. Repeat with mozzarella, meat sauce, lasagna, mozzarella, and meat sauce. Be careful how much meat sauce you use because I lost track of how many layers I was building and used all the meat sauce - not leaving any to top the final layer.


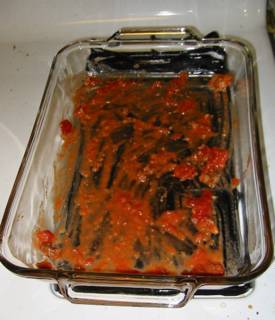
The top layer of pasta goes on the meat sauce, upside down. Cover this layer with the remaining sauce. This is when I realized I didn't have anymore sauce. By not covering this final pasta layer, I was guaranteed a very hard, dry covering that would probably need to be peeled off before eating the lasagna. I'll take pictures of a correctly made lasagna, the next time I make one and repost here.


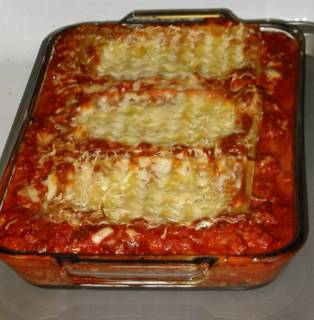
Cover the top layer of red sauce with the remaining mozzarella cheese and then sprinkle the final 1/4 cup of parmesan on top. This lasagna can now be cooled, wrapped and stored in the refrigerator for a couple days or frozen for a month.

Before baking, cover the top with aluminum foil. To help prevent cheese from sticking to the aluminum foil, brush or spray some oil onto the foil. Place the lasanga onto the middle rack in a preheated 375°F oven for 15 minutes. I like to place the pan in a baking sheet in case any bubble over occurs. After fifteen minutes have passed, remove the foil and continue baking for 25 more minutes. Remove from the oven and allow the lasagna to cool for a few minutes before cutting and serving.


Meat Lasagna (six large servings)

1 Tbs. olive oilcookaddaddstir inbring to simmerassemble375°F for 15 min. covered375°F for 25 min. uncovered
1 medium onion, chopped fine
6 garlic cloves, minced
1/2 lb. ground beef
1/2 lb. italian sausage, casings removed
1/2 tsp. salt
1/2 tsp. ground black pepper
1/4 cup heavy cream
28 oz. puree tomatoes
28 oz. diced tomatoes, drained
15 oz. ricotta cheesemixspread ontop
1-1/4 cup grated Parmesan cheese
1/2 cup chopped basil leaves
1 large egg, beaten
1/2 tsp. salt
1/2 tsp. ground black pepper
12 oven ready lasagna pasta
16 oz. mozzarella cheese

Layer diagram
4 oz. mozzarella cheese and 1/4 cup parmesan cheese
meat sauce
lasagna pasta
ricotta mixture
meat sauce
4 oz. mozzarella cheese
ricotta mixture
lasagna pasta
meat sauce
4 oz. mozzarella cheese
ricotta mixture
lasagna pasta
meat sauce
4 oz. mozzarella cheese
ricotta mixture
lasagna pasta
thin meat sauce layer
Copyright Michael Chu 2004

Wednesday, July 07, 2004

Recipe File: Pan Fried Fish Fillets

Last week I roasted a four pound cross rib roast (instead of a standing rib roast because I was too cheap to by prime rib just for an article). Well, I finally finished eating the roast. (After the initial feast, I sliced the roast into steaks and then reheated on a skillet for a couple minutes on each side with some onion powder and celery salt to produce a tender medium to medium-well steak dinner.) After eating steak (and grilled beef of several varieties because of the July 4th weekend), Tina decided she would like some fish.

We had some fairly thick fillets (about one inch) of catfish that I decided to pan fry (or saute, but I usually reserve this word for food that will actually be constantly moved on the pan). I always use a large non-stick skillet whenever I want to pan fry fish, but I had four fillets of catfish. I decided to do an experiment and cook all four at the same time - two on my non-stick skillet and two on my traditional saute pan.

My main concern was that the fish would stick to the stainless steel bottom of the traditional pan. After doing some research, it seemed that the Editors of Cook's Illustrated (in The Best Recipe) believed that heating a traditional pan enough prior to cooking would allow the fish to not stick to the stainless steel. I thought it was worth a try.

I heated both pans at medium-high heat. While the pans were heating, I seasoned the four fillets simply with salt and pepper. I poured about a tablespoon of oil in both pans and watched the oil until it shimmered. Then I placed two fillets in the non-stick pan and two fillets in the traditional pan. I started with the skin side up.

Since the fillets were about an inch in thickness, I set my timer for 5 minutes. I let the fish sit there and cook, splattering oil everywhere for the duration before attempting to dislodge them. The non-stick was pretty straightforward. I picked up the pan byt he handle and gave it a firm jerk. The fish fillets slide about an inch on the pan. Then I flipped them over with a spatula and started another timer for five minutes. I then moved over to the traditional pan and gave it the same jerk. No movement. I prodded a little with my spatula and it seemed like the fish was pretty much sealed to the pan. I dribbled a little more oil in and let it cook for an additional thirty seconds. Then I tried the jerk again. Nothing. Not wanting to over cook the fish, I went in with my spatula and carefully wedged teh edge of the spatula under the fish. Working my way around the fillet, I managed to release it and flip it over. I did the same with the second. What surprised me was that the color of the fish on the traditional pan was a rich golden brown while the non-stick pan gave me a darker brown crust. It was kind of a pain to scrape the fish off the traditional pan without destroying the fillet though. I started a second timer for the traditional pan - also at 5 minutes.

Once the five minutes were up for each of the pans, I removed them promptly onto a serving plate. In both cases, the fish were perfectly cooked - crispy exterior with almost flaking (but not quite flaky) interior. Also, the color from the traditional pan was a little better than the non-stick (although I couldn't discern a difference while tasting). However, the non-stick pan provides that extra insurance that a flip will be quick, easy, and efficient. In addition, the extra oil used in the traditional pan made for a bigger mess to clean up. When I usually use a non-stick pan, I will actually brush the oil onto the fish fillet and then pan fry without additional oil. This creates very little sizzle or splatter and makes for quick kitchen cleanup.

Pan Fried Fish Fillets

1 Tbs. oilheatpan fry
Fish filletsseason
Salt
Pepper

Pan frying time
Fillet ThicknessCooking Time on each sideFat
Thick - 1 inch5 minutes1 Tbs. olive oil
Medium - 3/4 inch4 minutes1/2 Tbs. olive oil & 1/2 Tbs. butter
Thin - 1/2 inch3 minutes1 Tbs. butter
Copyright Michael Chu 2004
The olive oil should have a high smoke point - use either high quality extra virgin olive oil for more flavor or light olive oil.

Thursday, July 01, 2004

Recipe File: Prime Rib or Standing Rib Roast

Prime rib used to refer to a prime grade standing rib roast, but these days all rib roasts (and some rib steaks) are called prime rib regardless of the USDA grade it recieved. The rib roast cut is usually so good that it doesn't need much seasoning. The ingredients I use are simple: a standing rib roast, salt, and pepper.

Preparation is also quite simplistic for an entree with such a grand reputation. In fact, with a couple tools, this dish is easier to prepare than any other special event food (roast duck, turkey). The items you'll need are a roasting pan (usually comes with your oven or you can get a large baking pan and a wire rack to place in it), a probe thermometer (like the Polder model that I use), some kitchen twine, and a pair of tongs.

Hmmm, now you need a standing rib roast (also known as prime rib even if the beef isn't prime quality). The term "standing" means that because the bones are included in the roast, the roast can stand by itself. A rib roast with the bones removed is commonly referred to as a rolled rib roast. My preference is for the standing variety because the bones provide additional flavoring to the roast. A rib roast comprises of seven ribs starting from the shoulder (chuck) down the back to the loin. Each rib feeds about two people, so if you have a party of eight, buy and cook a four rib roast. The rib roast closest to the loin is more tender than the rib roast nearest the chuck. This end is referred to as the small end rib roast or loin rib roast or sirloin tip roast. The chuck end of the rib roast is bigger and tougher and is sometimes referred to as a half standing rib roast or large end rib roast.

Depending on preference, you can dry age the roast for a few days to bring out additional flavor and produce a more buttery texture in the muscle (aging allows the natural enzymes to break down some of protein in the meat). Age the beef up to a week in the refrigerator by leaving it uncovered on a wire rack over a large pan to catch any drippings for at least a day and no more than seven days. When you are ready to cook the beef, trim off any dried pieces after the aging. It is common for a roast to lose about 10% to 15% of its weight during a week of aging.

Take the rib roast out of the refrigerator and let it sit on the counter for a couple hours to raise the roast temperature to near room temperature. To help cook the roast evenly, we'll need to tie the roast. Using kitchen twine, tie the roast parallel to the rib bones at least at each end. I usually tie between each pair of ribs. Heat the roasting pan or a separate pan on the stove until hot with a little oil. Place the roast on the pan and sear for three minutes on each side. Remove from heat and season heavily with salt and pepper. Place on the grill of your roasting pan or on a wire rack. Now stick the probe of your thermometer into the roast so that the probe is approximately in the middle of the roast (and not touching a bone). Position the pan on an oven rack in the lowest position of your preheated 200°F oven. Yes, 200°F. The low heat will evenly cook the roast so that most of the roast will be at the desired temperature. Cooking at a higher temperature will finish the roast faster, but you will probably result in well-done on the outside of the roast that gradually results in a medium-rare interior (if you are trying to cook a medium-rare roast). Roasting at 200°F will result in almost all the meat ending at medium-rare.

Set your thermometer for 130°F for a medium-rare roast (125°F for rare; 145°F for medium; any higher and it's overdone - you might as well be serving a cheaper piece of beef). When the roast is done (about 45 minutes per pound), remove from the oven, set the roast aside, and let it sit to redistribute juices for at least twenty minutes. This is a good time to make a jus from the drippings of the roast.

Pour off any extra grease that's collected in the pan. You can save this to make Yorkshire pudding if you wish. Now deglaze the pan by pouring in 1/2 cup beef broth and bring to a boil. After you've scraped off the bottom of your pan and mixed it into the jus, season with salt and pepper. Simple.

When slicing the roast, first cut the rib bones out and then lie the roast on the cut side to carve large slices off the roast.


Since prime rib is a fairly pricey roast, I didn't purchase one for the sake of taking pictures for this article. The next time I roast one, I'll take pictures. I did however prepare a cross rib roast (a cut from the chuck or shoulder that costs less than $3 per pound) in a similar manner as I described for the rib roast. Note how the medium-rare pink is uniform to the edges of the roast.


Standing Rib Roast

1 loin rib roast, trimmed & tiedsearseasonroast at 200°F until 130°F
salt
pepper

Jus
rib roast drippingsdeglazebring to boilseason
1/2 beef broth
salt
pepper

Yorkshire pudding
1 cup all purpose flourwhiskbeatpour mixture into panbake at 450°F for 15 min.bake at 350°F until golden brown (15 min.)
1/2 tsp. salt
2 large eggswhisk
1 cup whole milk
13 x 9 in. pan10 min. at 450°Fmelt
1/4 cup rib roast drippings or
4 Tbs. melted unsalted butter
Copyright Michael Chu 2004